Kubernetes Autoscaling
Introduction- Introduction: Kubernetes Autoscaling
- Chapter 1: Vertical Pod Autoscaler (VPA)
- Chapter 2: Kubernetes HPA
- Chapter 3: K8s Cluster Autoscaler
- Chapter 4: K8s ResourceQuota Object
- Chapter 5: Kubernetes Taints & Tolerations
- Chapter 6: Guide to K8s Workloads
- Chapter 7: Kubernetes Service Load Balancer
- Chapter 8: Kubernetes Namespace
- Chapter 9: Kubernetes Affinity
- Chapter 10: Kubernetes Node Capacity
- Chapter 11: Kubernetes Service Discovery
- Chapter 12: Kubernetes Labels
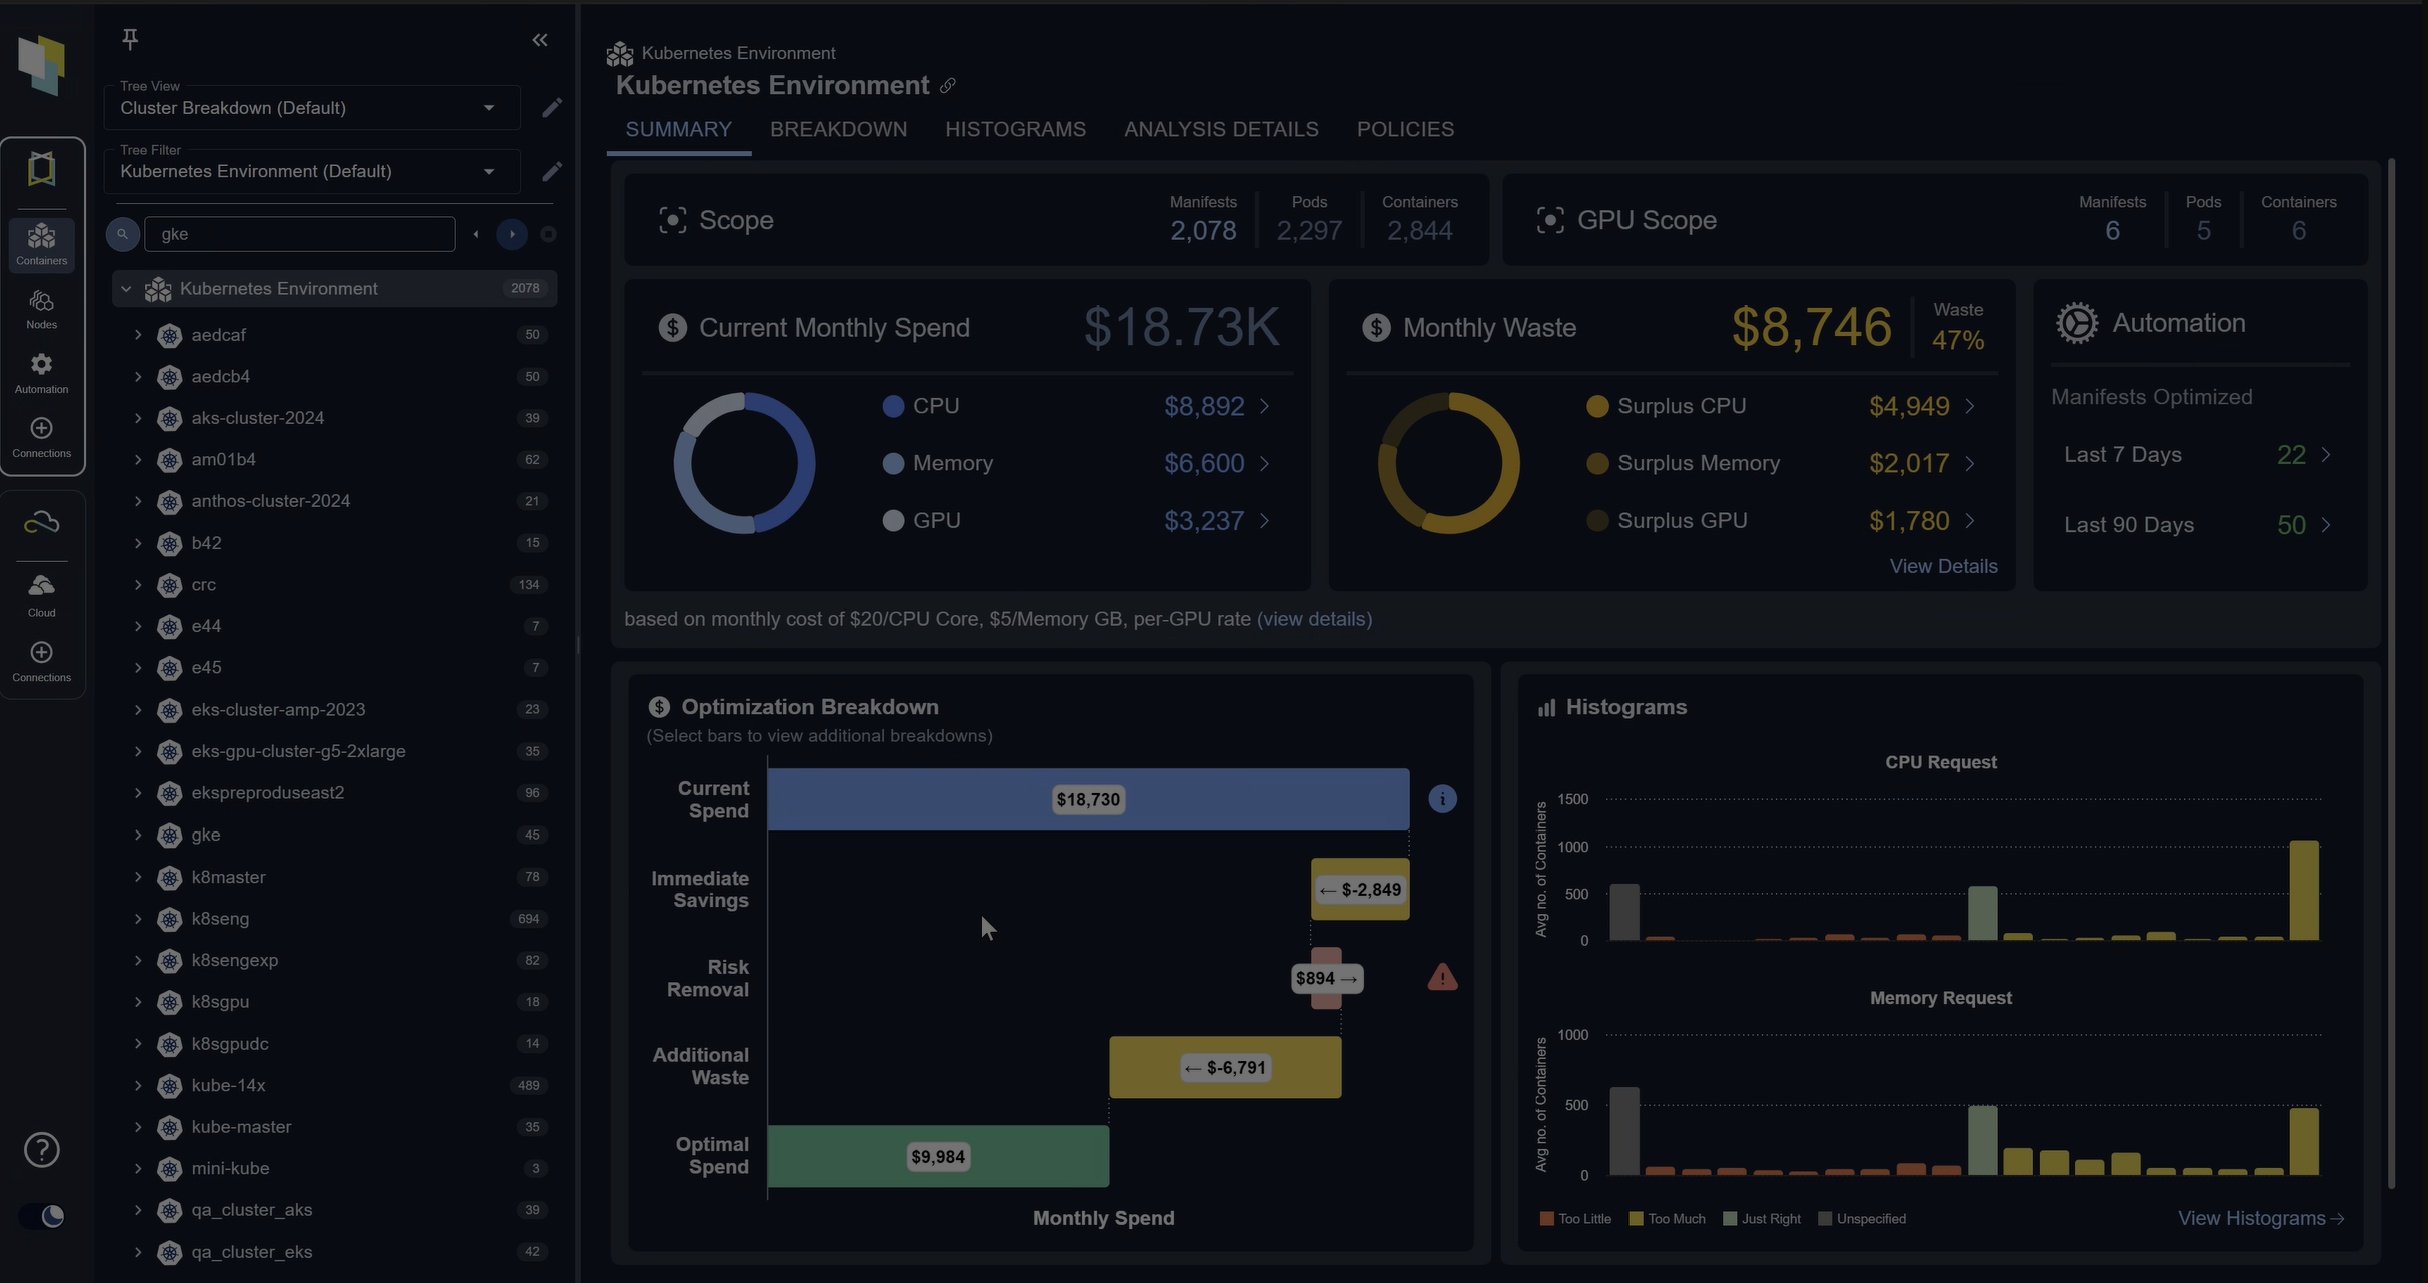
Kubernetes offers multiple levels of capacity management control for autoscaling. So much so that the multitude of knobs can confuse even the most experienced administrators.
Kubernetes schedulers assign pods of containers to cluster nodes with the entire process controllable by configuration parameters in YAML files. Using those files, Kubernetes administrators can request and set maximum limits for the CPU and memory available for use by each container within a pod (also known as resource request and limits).

Spend less time optimizing Kubernetes Resources. Rely on AI-powered Kubex - an automated Kubernetes optimization platform
Free 30-day TrialAdministrators can also provide instructions for Kubernetes to automatically allocate more CPU and memory to a pod according to CPU and memory usage criteria (also known as vertical pod autoscaling). Furthermore, they can configure Kubernetes to automatically replicate pods for stateless application workloads (also known as horizontal pod autoscaling). Finally, they can also configure the cluster to add more nodes once the other nodes are fully used or reserved (also known as cluster autoscaler).
- Vertical Pod Autoscaler (VPA)
- Increases and decreases pod CPU and memory
- Horizontal Pod Autoscaler (HPA)
- Adds and removes pods
- Cluster Autoscaler (CA)
- Adds and removes cluster nodes
Additional controls exist to help administrators guide workloads to specific nodes or node groups (also known as taints and tolerations) and create logical administrative domains within a cluster for different teams (also known as namespaces), each with its maximum allowed usage of cluster CPU and memory (also known as resource quotas).
Spend less time optimizing Kubernetes Resources. Rely on AI-powered Kubex - an automated Kubernetes optimization platform
Free 30-day Trial

Despite (or maybe in spite) of the sophisticated autoscaling technology, a Kubernetes cluster often accumulates financial waste and creates performance bottlenecks over time.

Spend less time optimizing Kubernetes Resources. Rely on AI-powered Kubex - an automated Kubernetes optimization platform
Free 30-day TrialThe top three reasons administrators don’t get away from the burden of balancing performance and efficiency are:
- Excessive container requests cause waste
- Users often request (or reserve) more CPU and memory for their containers than their application workloads use. Kubernetes respects such requests allowing waste to accumulate over time and magnify with automated replication.
- Resource configurations ignore IOPS and network
- Kubernetes focuses on CPU and memory; however, many performance bottlenecks are created within the I/O capacity to write to disk or the network bandwidth required to transfer data, thus complicating cluster node configuration.
- Static thresholds selected by humans pose a risk
- Manual thresholds (e.g., pod CPU request and limit) or autoscaling mechanisms based on moving averages (of coarsely aggregated data) aren’t a match for the machine learning algorithms required to ensure an accurate assessment of resource usage and lack in upstream open-source distributions.
In this guide, we explain the Kubernetes autoscaling and control functionality using examples and YAML configuration files and highlight the limitations that deserve the attention of administrators.
Spend less time optimizing Kubernetes Resources. Rely on AI-powered Kubex - an automated Kubernetes optimization platform
Free 30-day TrialTry us
Experience automated K8s, GPU & AI workload resource optimization in action.
Try us
Experience automated K8s, GPU & AI workload resource optimization in action.