Routing Booking Requests
Routing Booking Requests
#330070
Before you can route, you must define your booking requests. See Creating Booking Requests.
Routing Booking Requests Beyond Enabled Timeframes
When routing booking requests, capacity calculations are only performed for bookings within timeframes that have been enabled. If you have 90 days enabled as your furthest timeframe, capacity is not calculated for bookings beyond that timeframe (90 days) even if the All option is displayed in the timeline slider. If you evaluate a booking with a planned start date that is further than 90 days (or the furthest enabled timeframe), the evaluation will show that there is no available capacity for any hosting venue, their hosting scores will be zero, and any attempt to route it will fail. In this case you can still force the routing into a hosting venue, but the capacity for the bookings will not be modeled until the planned start date falls within an enabled timeframe.
Do not attempt to route at the same time a group of booking requests with planned start dates that fall both within the furthest enabled timeframe and beyond the furthest enabled timeframe (this can only happen when you select All in the timeline slider). When routing a booking request group, do not include the booking requests that are outside the last-enabled timeframe. If necessary, force those requests into a selected hosting venue individually.
Routing Booking Requests Within the Timeline
Step 1: Specifying the Timeline
You must update the timeline in accordance with the booking requests you need to route. For example, if the booking requests are all expected today, then set the timeline to Today. If the booking requests are expected five days from now, then set the timeline to the first timeframe that includes those booking requests. The hosting venues are evaluated and auto-routed based on the timeline.
See Filtering Booking Requests Using the Timeline Slider to filter booking requests using either the timeline.
Step 2: Selecting Your Booking Request Scope
Your booking requests are selected through the Booking Requests To Be Routed pane. Normally, you route booking requests by project but can route any one or more selected booking requests separately at different times. When you select a project (e.g. DVC Service folder), all the booking requests within that project are auto selected. Whatever you select to route, the routing is done to the same hosting venue.
To filter booking requests using the filter dropdown, see Filtering Booking Requests Using the Filters Dropdown.
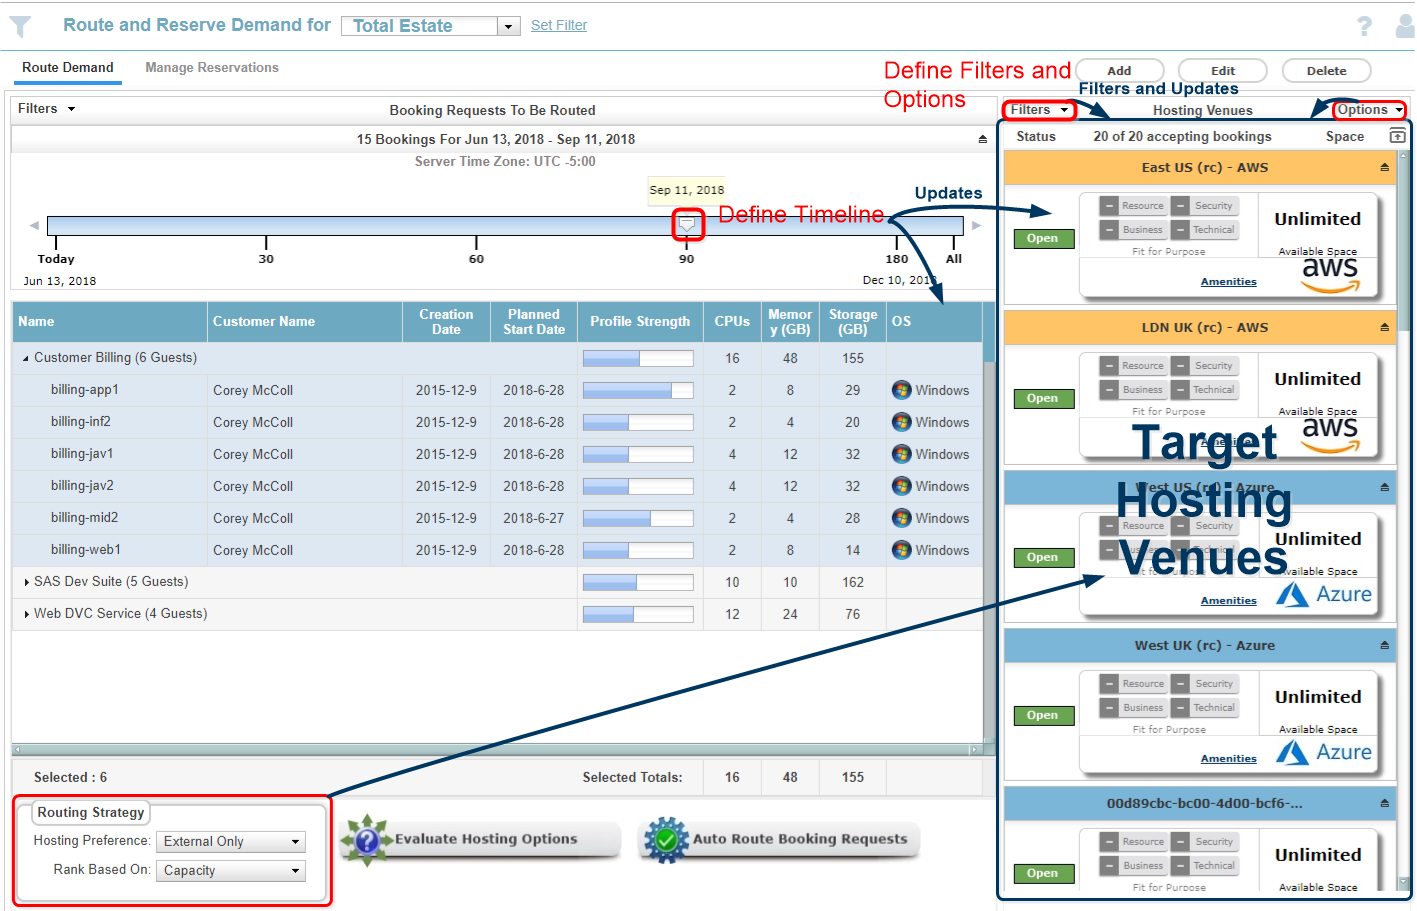
Step 3: Defining Your Target Hosting Venues
Before you evaluate your hosting options or auto route your booking requests, you can filter your target hosting venues and rank the filtered list with a hosting score calculation. Only the hosting venues shown in the Hosting Venues pane are used for evaluation and auto routing.
Whenever you change the filters and options, the timeline or the routing strategy, the Hosting Venues pane is updated to the unscored state (see Hosting Venue Tile Overview).
Step 3a: Specifying the Filters, Options
Knowing the booking requests you need to route, you can filter your target hosting venues based on environments, hosting venues and/or platforms. You can also ensure that the capacity unit used to define available space, cost and required space is appropriately defined so that hosting venues can be appropriately and relatively sized. See Filtering and Sorting Hosting Venues and Changing the Capacity Unit.
Step 3b: Specifying the Routing Strategy
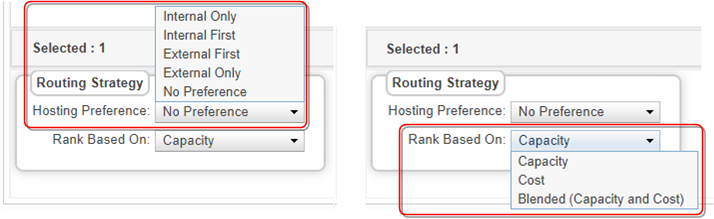
The routing strategy options are found at the bottom of the Route Demand screen. With the routing strategy, you can further filter and sort your hosting venues. For example, you may want to route to only internal hosting venues (i.e. "Internal Only") or give priority to internal hosting venues over external ones (i.e. "Internal First"). Also, you have the option to use cost-based, capacity-based or a combination of both when generating the Hosting Score.

The Hosting Preference works together with the Filters dropdown (see Filtering and Sorting Hosting Venues for details) to further order and filter the hosting venues displayed in the Hosting Venues pane. If there is only one type of platform category displayed in the Hosting Venues pane (e.g. only internal), then the Hosting Preference is not displayed. When displayed, the Hosting Preference provides the following options to further filter and order the hosting venues:
- "Internal Only"—updates the Hosting Venues pane to include only the internal virtual and internal physical hosting venues, e.g. VMware.
- "External Only"—updates the Hosting Venues pane to include only the external cloud hosting venues, e.g. AWS®, Azure®, Softlayer®, etc.
- "Internal First"—updates the Hosting Venues pane to display internal hosting venues first before the external hosting venues, but still maintaining the overall green to red order (i.e. the Closed hosting venues will always be at the end).
- "External First"—updates the Hosting Venues pane to display the external hosting venues first before the internal hosting venues, but still maintaining the overall green to red order (i.e. the Closed hosting venues will always be at the end).
- "No Preference"—updates the Hosting Venues pane with no further filtering and no preference to ordering.
Although the Hosting Preference does not impact the hosting score, it does impact the order in which hosting venues are displayed and in which booking requests are auto routed. For example, if the Hosting Preference is Internal First, then the Hosting Venues pane is updated to display the internal hosting venues first (followed by the external hosting venues) and the booking request is auto routed with preference to an internal hosting venue before any external hosting venue.
Note: If you sort by the option Hosting Venue, then the sorting is first by Hosting Preference with Filters, then by hosting venue within.
To define your routing strategy:
- At the bottom left of the Route Demand screen, specify your Hosting Preference if the Hosting Preference is displayed. The Hosting Preference will automatically update your Hosting Venues pane.
- Specify your Rank Based On hosting score calculation preference. You have the option of using a cost-based, capacity-based or blended (a combination of both) strategy when generating the hosting score. Capacity is the default value.
Note: When capacity is selected as the routing strategy, the Unit Cost/Relative Cost section is not shown in the Hosting Venue tile.
Step 4: Routing Manually or Automatically
Now you are ready to either evaluate the hosting venues to manually route or to route automatically. Only the hosting venues in the Hosting Venues pane are considered.
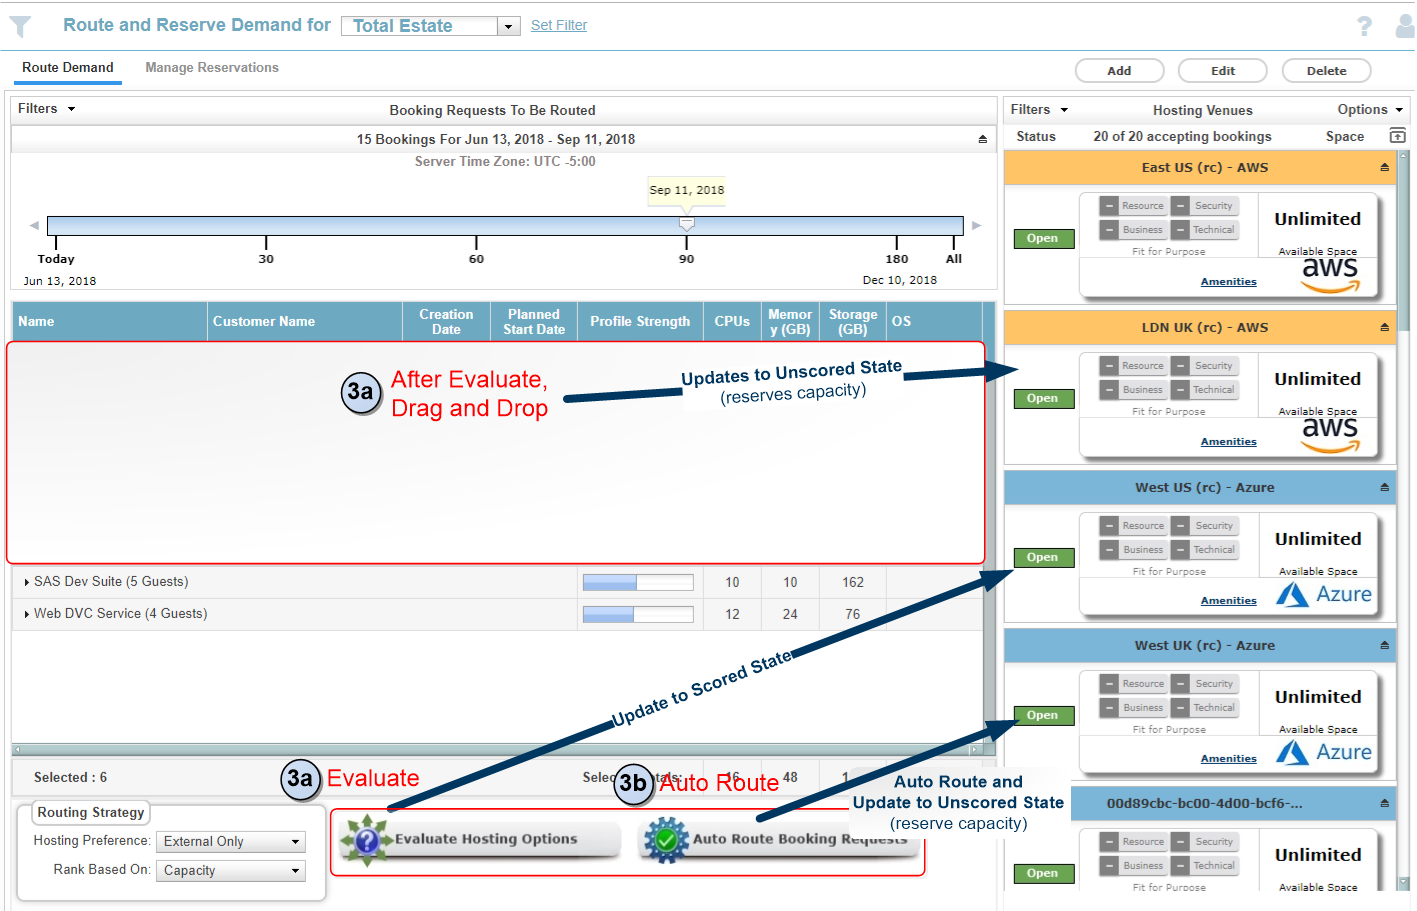
Step 4a: Routing Booking Requests Manually
If you want more control over where the booking request is routed, you have the option of selecting the hosting venue where this request will be placed instead of automatically routing it to the hosting venue with the highest score. After you select the booking request and click the Evaluate Hosting Options button, the details for each hosting venue change to show the hosting suitability for this booking request.
- In the Booking Requests To Be Routed pane, select one or more booking requests that you want to route. After you select a booking request, the routing buttons at the bottom of the screen are available for selection.
- Click the Evaluate Hosting Options button. The hosting venue tiles in the Hosting Venues pane are populated with details about the suitability of each hosting venue. For details on what information is available for the hosting venue, see Viewing the Hosting Venues Pane. In the below example, routing to this hosting venue takes up 50% of the remaining available capacity.
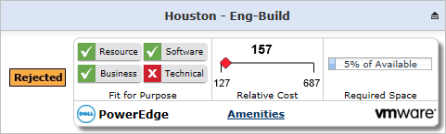
- If the hosting venue is not suitable, the hosting venue is shown with a Rejected status. You can click the Fit for Purpose section to view details showing why this hosting venue is unsuitable.
- Drag and drop the booking request onto the hosting venue tile where you want the booking request to be routed. Click OK in the confirmation window.
- If the hosting venue shows a Rejected status or has negative capacity, you can force route the booking request into that hosting venue if required. Click Yes on the force booking message.
You can filter the booking request list using one or both of the Group and OS fields in the Filters window. Select the filter option that you want to use and clear the filter by clicking Reset. You can collapse the timeline slider in this pane to better view the booking requests.

Note: You cannot force a booking into a hosting venue that is closed.
OR Step 4b: Routing Booking Requests Automatically
Instead of selecting the hosting venue where you want to place the bookings, you can also have the booking requests automatically routed to the hosting venue with the best fit. When the booking request is automatically routed, the booking is routed to the hosting venue with the highest score. The scope of the target hosting venues is based on those that are currently displayed in the Hosting Venues pane. Any hosting venue tile that is not displayed due to filtering is not included in the target scope.
- In the Booking Requests To Be Routed pane, select the booking requests that you want to route. After you select one or more booking requests, the routing buttons at the bottom of the screen are available for selection.
- Click the Auto Route Booking Requests button.
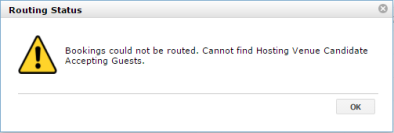
If a suitable hosting venue cannot be found, the routing request is rejected, and a window is displayed showing the reason for the rejection. Any rejected booking requests remain selected in the Booking Requests To Be Routed pane.
Step 5: Confirming the Successful Routing
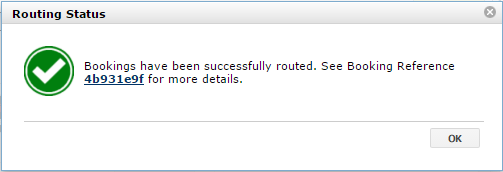
- When the bookings have been successfully routed, the following message is displayed.
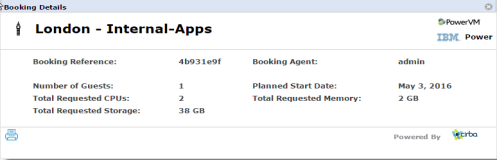
- Click the link to view the booking details, including the hosting venue where it was routed, the reference number, number of guests, requested CPUs, memory and storage as well as the planned start date and the individual who made the booking. The totals are calculated by adding the respective fields in the booking requests (e.g. the Total Requested CPUs is the total of all the CPUs in the booking requests). The Planned Start Date is the latest Planned Start Date of the booking requests.
- When the booking requests have been successfully routed, the booking requests are no longer displayed in the Booking Requests To Be Routed pane. You can navigate to the Manage Reservations link and view the details for this booking now in the Reservation Details pane.
- If the booking requests are routed to a full control hosting venue, you can see the bookings and their effect on the environment through the Control Console, when you move the timeline after the date when the corresponding workloads are planned to come online. An environment refresh is first required. See