Viewing Available Capacity
Viewing Available Capacity
#330190
To define the capacity unit and view the number of VMs that can be added:
- Make sure your capacity unit is properly defined, from the Options button of the Hosting Venues pane. See Changing the Capacity Unit for details. Click Save to refresh the Hosting Venues pane with the unscored state details.
- Filter and sort the hosting venues, if required, to narrow and sort your hosting venue scope. See Filtering and Sorting Hosting Venues.
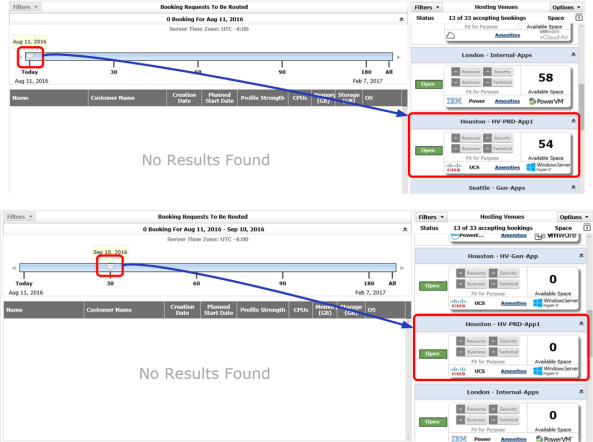
- Update the timeline to see the available space for a specific timeframe in the future. Notice that for today, hosting venue Houston - HV-PRD-App1 has 54 slots, based on the current policy settings. For 30 days from today, the same hosting venue will be out of capacity.
- When you route new bookings, that hosting venue's available capacity is decreased appropriately. For example, if you have 3 bookings the same size as that of the capacity unit, then the hosting venue's Available Space is reduced by 3 after the bookings are routed (for the planned date and into the future).
The capacity unit values define a VM size that serves as a measuring unit for calculating available space and unit cost. The amount of available space is calculated by how many times the capacity unit can fit into the hosting venue. Capacity unit values are shown as CPUs, memory (GB), provisioned and used storage space, and workload profile. For more information on how the capacity unit is used in the hosting venue tile, see Unscored Hosting Venues and Capacity Unit Measurements.
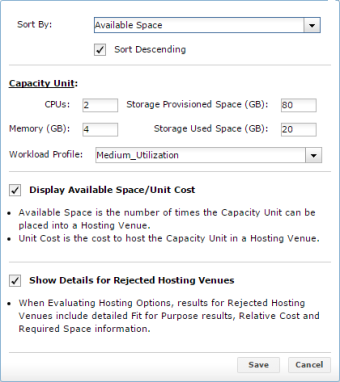
Note: Capacity unit calculations (Available Space, Unit Cost) are only shown in the Hosting Venue tile if the Display Available Space/Unit Cost option is enabled. It is significantly faster to show information in the hosting venue tiles when this option is disabled.
- In the Hosting Venues pane, click the Options button.
- In the Capacity Unit section, enter the details for the capacity unit that you want to use:
- In CPUs, enter the vCPU amount.
- In Memory, enter the memory amount in GB.
- In Storage Provisioned Space, enter the amount in GB.
- In Storage Used Space, enter the amount in GB.
- In the Workload Profile, select the workload profile for the capacity unit.
- After setting the capacity unit, click Save.
Note: Capacity unit values are saved as a user preference in the Densify database and are used until new values are saved.
After changing the capacity unit, the unit cost and available space amount change to reflect the new amounts, if set to display.
As a best practices, you should configure the same baseline capacity unit for both the Route and Reserve Demand page and the API:
- Route and Reserve Demand page—through the Options button of the Hosting Venues pane (see Changing the Capacity Unit for details).
- API—Contact [email protected] to ensure this setting is consistently defined.
Available Capacity through Reports
You can also view the available capacity from the Forecast report. For details, see
The available capacity shown through this report may differ from that of the Route and Reserve Demand page, if you override the capacity unit option for the Route and Reserve Demand page.