Creating AWS Cloud Connections
Creating AWS Cloud Connections
#380xxx
You can connect to your AWS account with the following method:
- CloudFormation Template—You need your account credentials and an external ID, which corresponds to a password. See AWS Data Collection Using a CloudFormation Template for details on creating the connection. Once the connections are created, you will see them in the Cloud Connections page.
- IAM Role—An IAM role establishes a trust relationship between AWS accounts and Densify. You need to complete the prerequisite setup in your AWS account, including the external ID and Role ARN. See AWS Data Collection Using IAM Roles Prerequisites.
Configuring a Connection to AWS
- Click the Add button and select AWS.
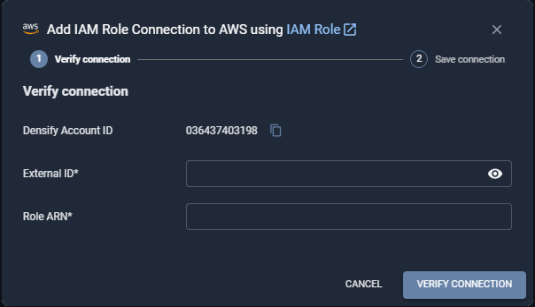
- The Densify Account ID is predefined. This value must match the value you entered when you created the role in AWS.
- Enter the AWS-specific connection parameters, listed in the table below.
- Verify your connection by clicking Verify Connection.
- If the credentials are valid, you will be connected and authenticated.
- If the credentials cannot be validated, then review the displayed error message and correct your credentials. It is possible that the user account does not have the required permissions or that the IAM role has not been setup properly.See Troubleshooting AWS Cloud Connections for details.
- Once the account is verified, Densify discovers the AWS account ID and displays the ID number in a second dialog box.
- Optionally, specify a connection name to clearly identify the AWS account in Densify. This name will appear in the Cloud Connections list so you can easily identify this connection.
- Click the Save Connection button, that appears when the connection is successfully verified.
- If you want to add another connection, click Add and repeat these steps to configure the connection.
Figure: Accessing the Add Button
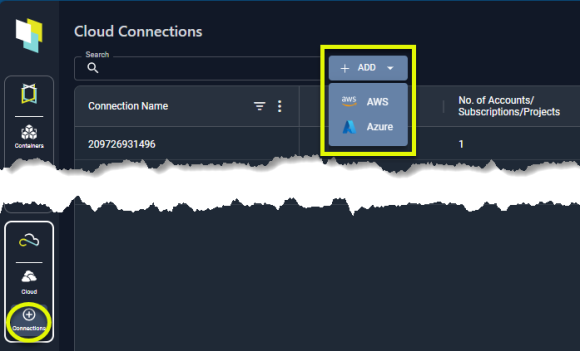
Figure: AWS Connection Window
|
Field |
Description |
|
External ID |
The external ID specified for Densify, when you created the IAM role in AWS. If you need to edit or review a saved connection, for security reasons, you will need to re-enter the external ID. |
|
Role ARN |
The Amazon Resource Name (ARN) for the IAM role that you created in AWS. |
Note: The External ID and the Role ARN are encrypted and are not displayed as plain text in log files.
Note: The number of instances returned is an estimate obtained when Densify verifies the connectivity. It may not match the number of instances discovered during the more detailed, scheduled data collection.
Figure: Connection Confirmation Window

The connection name must be unique within the AWS connection type section, so if the name is already in use, you are prompted to enter a new connection name.
The Connection Name is limited to 32-characters.
The connection table is updated with your new connection listed. Actual data collection will begin at the scheduled time, usually overnight.