Microsoft Azure Data Collection Prerequisites
Microsoft Azure Data Collection Prerequisites
#410110
Obtaining Azure Account Credentials
Use the following information to create and configure the user name and password for your Azure account. You will then use this information to create a cloud connection from your Densify instance.
Note: Azure Stack is not supported. This data collection method currently only supports Azure Cloud.
Additionally, only the standalone Azure Active Directory is supported. If you are using a federated (local) account, see
The account must be assigned the role of "Reader" for each of the subscriptions from which data will be collected.
If you are using the Densify API you must use a service principle to create the connection. See
Create User Account
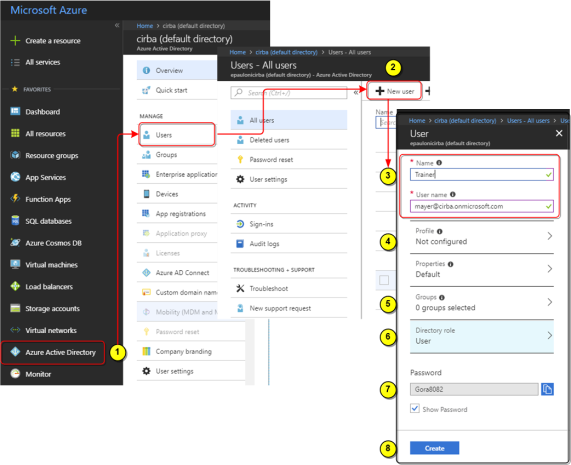
- Login into your Azure account and click on Azure Active Directory > Users.
- Click New user to create the new account.
- Enter a name and user name. The user name should be a valid email address. The user name is the identifier that you will use to sign into Azure Active Directory.
- Optionally, configure a profile.
- Optionally, select the Group(s) to which this user belongs.
- Optionally, select a Directory role. By default the directory role is set to user, which is adequate for the purpose of creating a cloud connection through Densify.
- The password is auto-generated. Click Show Password to see the password and copy it for later use
- Click Create to create the user account. This button only comes visible when you have correctly entered the required information.
Note: Depending on your company's password policy, you may need to change this password before using it to create the Densify cloud connection. If necessary, change the automatically generated password and then create the cloud connection.
Assigning User Access to Subscriptions
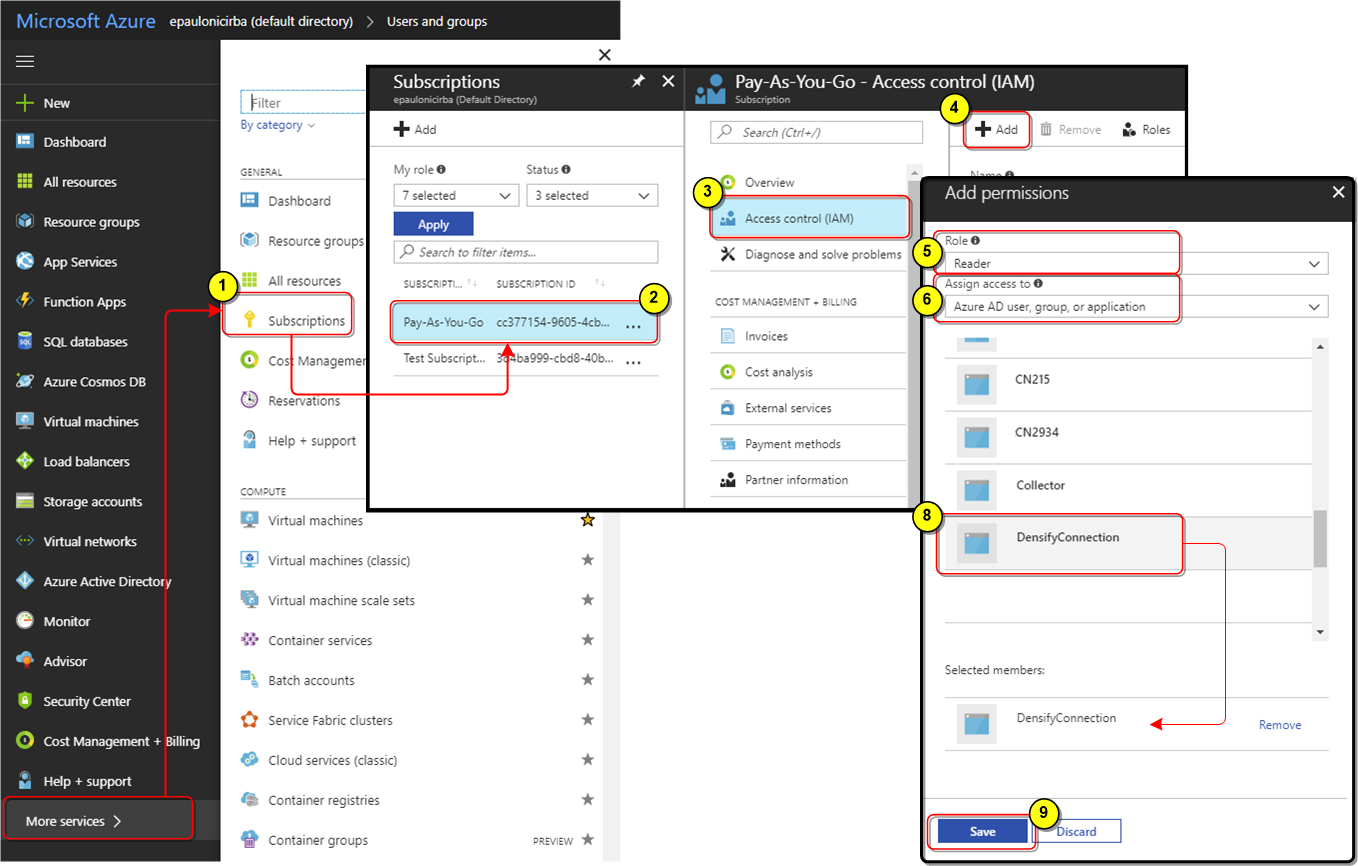
The user, created above, now needs access to each of your subscriptions. You need to assign the "Reader" role to the user for each subscription being audited, by doing the following:
- Navigate to Subscriptions in the main menu. You may need to click on More services to see Subscriptions.
- Click on a subscription to select and open the configuration page.
- Click Access Control (IAM).
- Click Add.
- In the Add Permissions pane select the Role of "Reader".
- Ensure Assign Access to is set to Azure AD user, group or application.
- Search for or scroll to locate the user that you created. above.
- Select the user. It will appear under Selected members.
- Click Save to save these changes.
- The user account that will be used to create the cloud connection will need access to all subscriptions from which you want to collect data, so repeat this process for each subscription to be included.
Once the account has been configured you can use the user name and password to create the cloud connection as outlined in
Creating the Cloud Connection in Densify
Once all of the prerequisites are complete, you can create the cloud connection through the Cloud Connection wizard. See
Modifying Your Azure Cloud Connection
When you create the Azure cloud connection for the first time, Densify discovers all of the subscriptions, associated with the user or service principal. Upon saving the connection it will schedule data collection from each of the discovered and selected subscriptions.
If subsequently, subscriptions are added, they will not be included in data collection. Additionally, subscriptions that are removed will continue to be included, resulting in wasted time and resources. To add new subscriptions or remove old ones, edit the cloud connection. See