Using Container Filters
Using Container Filters
#380650
You can apply various filters to customize the scope of the container data you are reviewing.
- Container Filters strip—Displayed at the top of the page allows you to filter on container attributes to create a subset of systems for preliminary review or detailed investigation.
- A Filter Table—Allows you to create more complex filters. An icon located with the other data controls opens the table.
Container Filter Strip
The available filter options are based on the content of the table to be filtered.

Note: The message "No data available" is displayed if you set the filters to exclude all systems.
|
Container Filters |
More Filters |
|
|---|---|---|
|
|
|
Different filtering options are available for nodes and node groups.
|
Node Group Health Filters |
|
|---|---|
|
|
Persisting Filter Settings Across Pages
The selected filter options are persistent across the other container optimization tabs.
For example, on the Containers dashboard the selected filters that are applied to the Summary tab are also applied to the Data page.
The filtering options also persist across user login sessions. When you log out and log back into Densify, your container filter selections are retained.
Note: The container filters and public cloud filters are similar in appearance and use, but the attributes on which you can filter are different and the filters are not persistent between these two dashboards.
Exporting Data with Filters Applied
When you export the content of a report with filters applied, the filtered set of systems is exported for the Data and Details tabs.
Clearing Applied Filters
Click the Reset button on the right side of the filter strip to clear all of the filters that have been applied. You need to be on one of the pages that display the filter strip. You cannot clear or edit the applied filters from the Data or Details tabs.
Using the Filter's Search Feature
Click the search icon in the filter selection drop downs to search for specific system attributes or tags.
- Click the drop down to open and uncheck Select All at the top of the drop down.
- Click the search icon
 to display the search bar.
 - Enter the search term and press Enter (keyboard). The list updates with all systems that contain the specified search criteria.
- Check the items you want to filter on and click OK. The selected items are added to the current settings.
- Click Apply to update the page with the filter settings you have defined.
You can enter another set of criteria to add more items to your list. This allows you to filter on multiple items.
Multi-Select Search Features
If you have items already selected in the drop down and then search and select additional items, these items are added to the items already selected. For example:
- Expand Business Unit. In the figure below, 2 items are already selected.
- Search for "trading".
- You find 2 more items and select them.
- You are now filtering on 4 values.
- You can search again and add more items to the list.
- Click OK to select these 2 items and then open the drop down again to view the complete list of items you have selected.
- Click Apply to update the page with the filter settings you have defined.
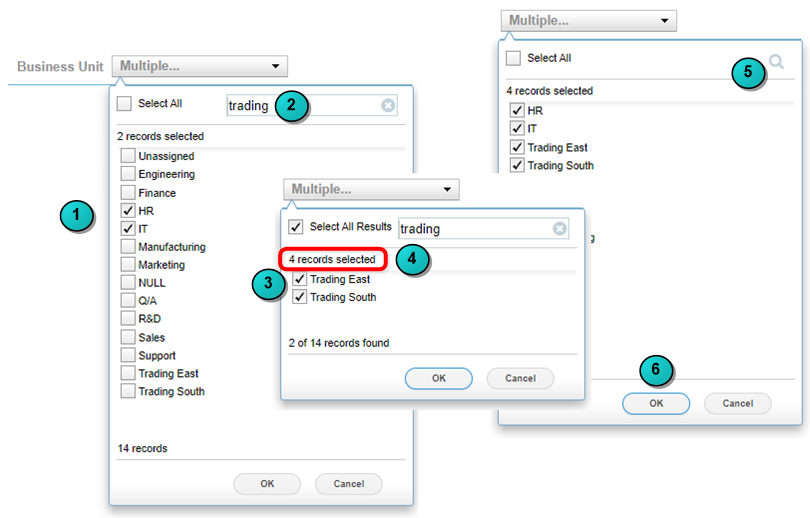
Use the notes at the top and bottom of the drop down to determine the number of items in your filter.
Additional Search Features
When using the filter's search features, note the following:
- The search is not case-sensitive.
- If no systems contain or match the search criteria, a message is displayed.
- Click
 at any time to cancel the search or clear the search box.
 - A vertical scroll bar is displayed if the list is longer than the drop down window.
- You may see a spinning icon when the search or load takes more than 1 second to display the results.
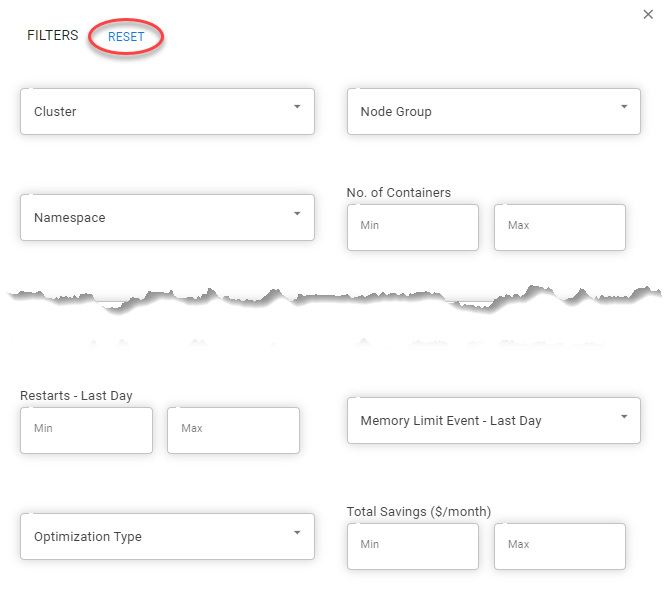
Typically when working with containers you will encounter many containers and it can be difficult to view and manage recommendations. The options in the filter table allow you to create more complex filters. The table filter is provided on the following pages:
|
|
The filter table uses values, from selected columns from the tabular report, to create a filter. Options in each section are based on your data.
- Define your filter by:
- Selecting one or more items in one or more fields.
- Specifying a range by entering minimum and maximum values.
- As you make selections the table is updated to show just the rows that match the selected criteria.
- Your filter selections are additive. i.e. a row must meet all of the of selected filtering criteria to be displayed.
- Selected filtering options are displayed at the top of the table.
- Click the Reset button, at the top of the table, to clear all of the filtering options.
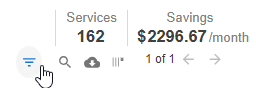
Note: The summary bar, shown in the upper right corner of the page will not be updated based on the criteria in the new table filter. This indicates that filtering has been applied.