Creating Azure Cloud Connections
Creating Azure Cloud Connections
#380xxx
Densify uses a Service Principal to access one or more of your Azure subscriptions. See Microsoft Azure Data Collection Prerequisites for details on configuring the Service Principal and obtaining the required credentials.
- Click the Add button and select Azure.
- Enter the Azure-specific connection parameters. A link in the header takes you to the online help.
- Click Verify Connection to validate your settings.
- If the credentials are valid, you will be connected and authenticated.
- If the credentials cannot be validated, then review the displayed error message and correct your credentials. See Troubleshooting Azure Cloud Connections for details.
- Once the account is verified, all subscriptions that are associated with the account or Application ID are listed. Select the subscriptions that you want to include in this connection.
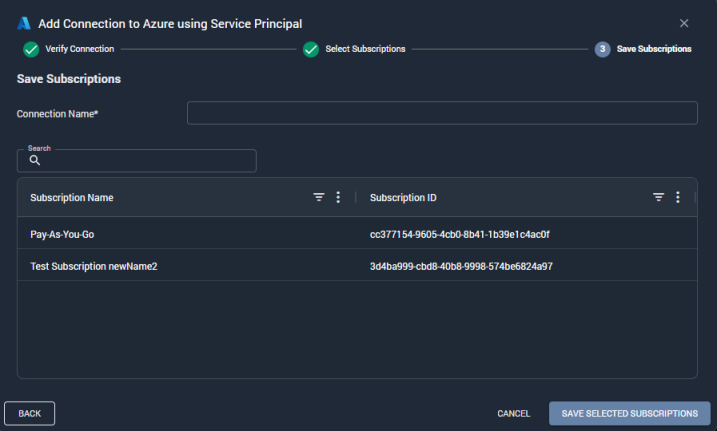
- Specify a connection name to clearly identify the AWS account in Densify. This name will appear in the Cloud Connections list so you can easily identify this connection.
- If you want to add another connection, click Add and repeat these steps to configure the connection.
Figure: Accessing the Add Button
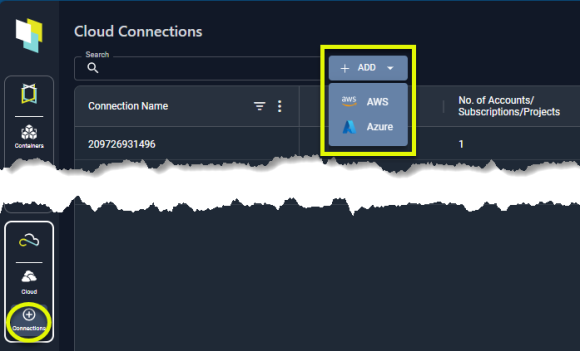
Figure: Azure Connection Window

Table: Azure Connection Parameters
|
Field |
Description |
|
Application ID |
Specify the Application ID/Service Principal. Both the ID and the corresponding key are provided when you create the application through your Azure portal. |
|
Secret Key |
Enter the key corresponding to your application/service principal. This is called the Client Secret in the Azure portal interface. |
|
Tenant ID |
The Directory (tenant) ID is a unique identifier that represents your Azure Active Directory tenant. |
Note: The number of instances returned is an estimate obtained when Densify verifies the connectivity. It may not match the number of instances discovered during the more detailed, scheduled data collection.
Figure: Subscription Selection Window
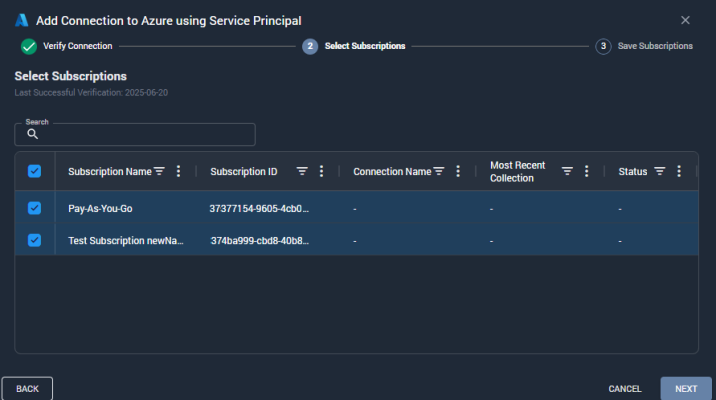
Figure: Connection Confirmation Window
The connection table is updated with your new connection listed. Actual data collection will begin at the scheduled time, usually overnight.
Note: If you create another connection, you must ensure subscriptions are not included in more than one cloud connection, and each connection name must be unique.